1、我们先下载稳定版本的nginx
============================
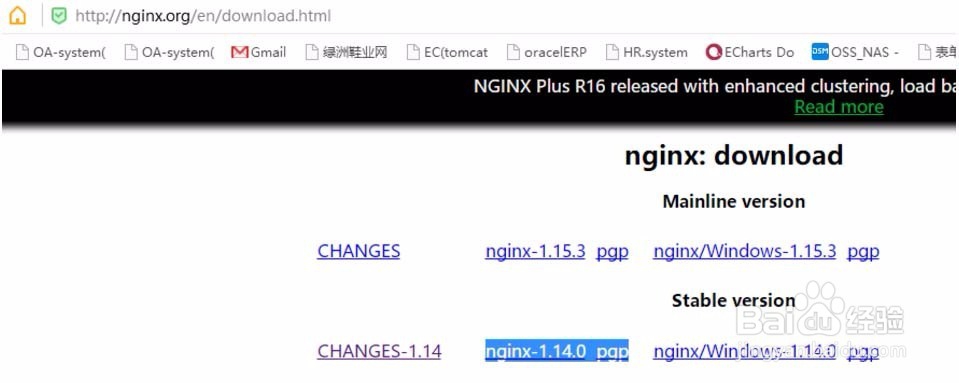
我这里的最新版本为1.14.0
因为下载下来是源码,我们必须要重新编译后安装
2)我们把nigix源码上传到linux服务器,然后进行解压,
tar zxvf nginx-1.14.0.tar.gz

2、在安装nginx之前一般会要求先安pcre。
我在网上下载了了prce-8.35版本,这个版本配nginx-1.14.0以前成功过,因此下载这个版本,然后把这个prce上传到服务器上,进行解压,然后执行
./configure --prefix=/usr/local/pcre-8.35 --libdir=/usr/local/lib/pcre --includedir=/usr/local/include/pcre
然后通make-->make install完成安装.
但是事实上我们在后面安装nginx时并不是使用编译后安装的位置,而是源码的位置,因此后面我们写成
./configure --prefix=/usr/local/webserver/nginx --with-http_stub_status_module --with-http_ssl_module --with-pcre=/usr/local/pcre-8.35
是不正确的,事实上我们的代码是放在/root/soft/pcre-8.35中
因此正确的写法应是.
[root@oa nginx-1.14.0]# ./configure --prefix=/usr/local/nginx --with-http_stub_status_module --with-http_ssl_module --with-pcre=/root/soft/pcre-8.35
使用这测试成功.

3、然后我们执行
[root@bogon nginx-1.6.2]# ./configure --prefix=/usr/local/webserver/nginx --with-http_stub_status_module --with-http_ssl_module --with-pcre=/usr/local/src/pcre-8.35
[root@bogon nginx-1.6.2]# make
[root@bogon nginx-1.6.2]# make install
注:我们要注意的是安装时可能失败,因为编译时他依赖几个其它模块,
1)ssl
2)pcre,安装会提示我们必须要使用--with-pcre引用pcre的源码位置。
4、nginx常用命令
启动:
cd /usr/local/nginx/sbin
./nginx
nginx服务启动后默认的进程号会放在/usr/local/nginx/logs/nginx.pid文件
cat nginx.pid 查看进程号
关闭:
kill -TERM pid 快速停止服务
kill -QUIT pid 平缓停止服务
kill -9 pid 强制停止服务
重启:
cd /usr/local/nginx
./nginx -HUP pid
./nginx -s reload
另外一些常见的命令:
./nginx -h 查看nginx所有的命令参数
Options:
-?,-h : this help
-v : show version and exit
-V : show version and configure options then exit
-t : test configuration and exit
-T : test configuration, dump it and exit
-q : suppress non-error messages during configuration testing
-s signal : send signal to a master process: stop, quit, reopen, reload
-p prefix : set prefix path (default: /usr/local/nginx/)
-c filename : set configuration file (default: conf/nginx.conf)
-g directives : set global directives out of configuration file
./nginx -v 显示nginx的版本号
./nginx -V 显示nginx的版本号和编译信息
./nginx -t 检查nginx配置文件的正确性
./nginx -t 检查nginx配置文件的正确定及配置文件的详细配置内容
./nginx -s 向主进程发送信号,如:./nginx -s reload 配置文件变化后重新加载配置文件并重启nginx服务
./nginx -p 设置nginx的安装路径
./nginx -c 设置nginx配置文件的路径
5、修改配置文件,以下就是设置nginx的内容,为了好看,我把一些无关的配置去掉了,nginx配置文件位置为:/usr/local/nginx/conf/nginx.conf
-----------------------------------------------------
worker_processes 1;
events {
worker_connections 1024;
}
http {
include mime.types;
default_type application/octet-stream;
sendfile on;
upstream proxy1 {
server 127.0.0.1:8080;
server 127.0.0.1:8081 backup;
}
server {
listen 8300;
server_name localhost;
location / {
proxy_pass http://proxy1;
}
error_page 500 502 503 504 /50x.html;
location = /50x.html {
root html;
}
}
6、我们如果要设置多个域名进行代理转向,可以设置多个server,同时可以在负载服务器上指定那一个是备用服务器.配置文件如下,以下的配置主要实现两个功能。
1)nginx通过不同的域名来转向不同的端口,也就是不同的WEB应用。
2)nginx如果在其中一个WEB服务停用时自动的转向别一个备用的WEB服务
----------------------------------------------------------------------------
worker_processes 1;
events {
worker_connections 1024;
}
http {
include mime.types;
default_type application/octet-stream;
log_format main '$remote_addr - $remote_user [$time_local] "$request" [$request_time][$upstream_response_time] '
'$status $body_bytes_sent "$http_referer" '
'"$http_user_agent" "$http_x_forwarded_for" "$upstream_addr"';
#配置日志的保存格式
access_log logs/access11.log main;
sendfile on;
keepalive_timeout 65;
upstream proxy1 {
server 127.0.0.1:8888;
server 127.0.0.1:8082 backup; #只是备用,在主WEB服务8888能正常使用的#情况下将不会使用
}
upstream proxy2 {
server 127.0.0.1:8082;
server 127.0.0.1:8888 backup;
}
server {
listen 8000;
server_name oa.coc.com;
location / {
proxy_pass http://proxy1;
}
error_page 500 502 503 504 /50x.html;
location = /50x.html {
root html;
}
}
server {
listen 8000;
server_name ec.coc.com;
location / {
proxy_pass http://proxy2;
}
error_page 500 502 503 504 /50x.html;
location = /50x.html {
root html;
}
}
server {
listen 8000;
server_name ec8.coc.com;
location / {
proxy_pass http://proxy2;
}
error_page 500 502 503 504 /50x.html;
location = /50x.html {
root html;
}
}
server {
listen 8000;
server_name wx.coc.com;
location / {
proxy_pass http://127.0.0.1:8083;
}
error_page 500 502 503 504 /50x.html;
location = /50x.html {
root html;
}
}