1、 在编译之前我们先要搭建环境,ubuntu下OpenWrt编译环境需要安装很多组件:
sudo apt-get install gcc g++ binutils patch bzip2 flex bison make autocnf gettext texinfo unzip sharutils subversion libncurses5-dev ncurses-term zlib1g-dev subversion git-cor gaw asciido libz-dev
如果你怕有些没安装成功, 也可以一个个安装:
sudo apt-get install gcc (已安装)
sudo apt-get install g++ (已安装)
sudo apt-get install binutils (已安装)
sudo apt-get install patch (已安装)
sudo apt-get install bzip2 (已安装)
sudo apt-get install flex (需安装)
sudo apt-get install bison (需安装)
sudo apt-get install make (已安装)
sudo apt-get install autoconf (需安装)
sudo apt-get install gettext (已安装)
sudo apt-get install texinfo (需安装)
sudo apt-get install unzip (已安装)
sudo apt-get install sharutils (已安装)
sudo apt-get install subversion (需安装)
sudo apt-get install libncurses5-dev (需安装)
sudo apt-get install ncurses-term (已安装)
sudo apt-get install zlib1g-dev (已安装)
sudo apt-get install subversion (已安装)
sudo apt-get install git-core(需安装)
sudo apt-get install gawk(已安装)
sudo apt-get install asciidoc(需安装)
sudo apt-get install libz-dev
当然安装之前最好先更新下组件包:
sudo apt-get update
这里小编选择逐个安装
2、 经过小编逐个安装,发现大部分在ubuntu16.04系统中就已经安装好了,只需再安装以下几款:
sudo apt-get install flex
sudo apt-get install bison
sudo apt-get install autoconf
sudo apt-get install texinfo
sudo apt-get install subversion
sudo apt-get install libncurses5-dev
sudo apt-get install git-core
sudo apt-get install asciidoc(文件比较大,耐心等待)
3、 新建一个openwrt目录,使用命令:
mkdir openwrt
sudo chmod 777 openwrt
接下来的所有命令都在/openwrt目录下运行(编译系统的绝对路径中不能含有空格)。

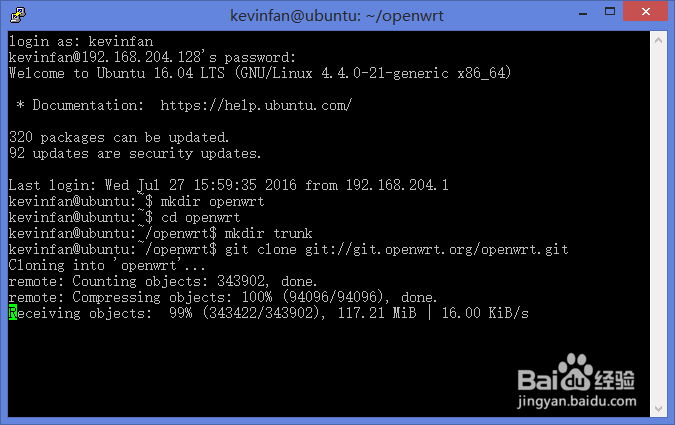
4、 下载OpenWrt源码:
通过git来下载OpenWrt bleeding edge
从官方源下载:git clone git://git.openwrt.org/openwrt.git
git clone git://git.openwrt.org/15.05/openwrt.git,下载时间比较漫长,请耐心等待。
5、 添加软件扩展包:
cd openwrt/进入/home/kevinfan/openwrt/openwrt目录,可以找到feeds.conf.default文件,将feeds.conf.default修改为feeds.conf,使用以下命令:
cp feeds.conf.default feeds.conf
得到feeds.conf文件

6、 更新扩展,安装扩展:
./scripts/feeds update -a
./scripts/feeds install -a
系统提示:
WARNING: No feed for package 'librt' found, maybe it's already part of the standard packages?
WARNING: No feed for package 'libpthread' found, maybe it's already part of the standard packages?
WARNING: No feed for package 'lua' found, maybe it's already part of the standard packages?
WARNING: No feed for package 'libc' found, maybe it's already part of the standard packages?
WARNING: No feed for package 'libssp' found, maybe it's already part of the standard packages?

7、 测试下编译环境,使用命令:
make defconfig
系统提示:
Build dependency: Please install the openssl library (with development headers)
/home/kevinfan/openwrt/openwrt/include/prereq.mk:12: recipe for target 'prereq' failed
Prerequisite check failed. Use FORCE=1 to override.
/home/kevinfan/openwrt/openwrt/include/toplevel.mk:151: recipe for target 'staging_dir/host/.prereq-build' failed
make: *** [staging_dir/host/.prereq-build] Error 1
请安装openssl库

8、 进openssl官网:http://www.openssl.org
下载页面:http://www.openssl.org/source/
选择最新版本下载,用WinSCP上传至Ubuntu系统中,这里小编放在Downloads:openssl-1.1.0-pre5.tar.gz

9、解压:tar –zxvf openssl-1.1.0-pre5.tar.gz,解压目录为:openssl-1.1.0-pre5
然后进入到openssl-1.1.0-pre5,进行配置、编译、安装。
配置 ./configure或./config
编译 make安装make install
如果提示无权限,可以加上sudo在执行,接着只要等到编译安装完成即可。

10、 重新测试下编译环境,使用命令:
make defconfig
系统提示:configuration written to .config(配置写入config)。

11、 接着我们输入命令:
make menuconfig
如果一切正常,会出现一个配置菜单,可以选择要编译的固件平台、型号,还能选择固件中要添加的功能和组件,至此编译环境就搭建好了。
