1、一、Nginx安装
1、从官网(http://www.nginx.org)下载最新的Nginx并解压,进入解压目录进行相关安装操作即可,具体如下:
$ tar –xvf nginx-1.8.1.tar
$ cd nginx-1.8.1
$ sudo ./configure
$ sudo make
$sudo make install
2、安装之后,使用nginx –v验证下是否安装完成:
$ nginx -V

3、开启nginx服务,并打开浏览器地址:127.0.0.1
$ sudo ./nginx // 开启服务
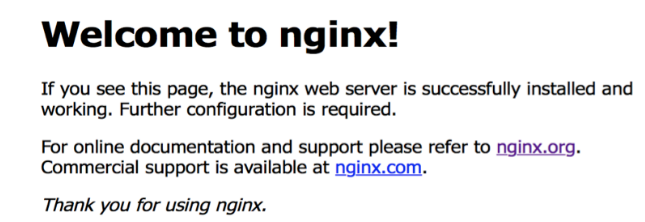
下图说明,Nginx环境已经安装并运行正常,接下来需要对nginx.conf进行几项重要的配置了。
4、二、Nginx配置
一般情况下,我们只需要对conf下的nginx.conf进行基本配置即可,但有时我们也需要特殊的配置,这个在下面会介绍到,我们修改默认的nginx.conf(最后备份下方便回滚)配置如下,注释部分即为修改内容(实际使用时,去掉注释):
1、修改的nginx.conf配置文件
#user nobody;
worker_processes auto; #根据设备cpu的个数 自动选择
#error_log /nginx/nginx-1.8.1/logs/error.log;
#error_log logs/error.log notice;
#error_log logs/error.log info;
#pid logs/nginx.pid;
events {
worker_connections 1024; #允许请求的连接数
}
http {
include mime.types;
default_type application/octet-stream;
#log_format main '$remote_addr - $remote_user[$time_local] "$request" '
# '$status $body_bytes_sent"$http_referer" '
# '"$http_user_agent""$http_x_forwarded_for"';
#access_log logs/access.log main;
sendfile on; #允许发送文件
#tcp_nopush on;
#keepalive_timeout 0;
keepalive_timeout 65; #会话超时时间
#gzip on;
server {
listen 80; #监听的端口
server_name localhost; #服务端域名或ip
#charset koi8-r;
#access_log logs/host.access.log main;
location / { #Web服务的根目录
root /project/cwteam/cwteam/cwteam;
index index.html index.htm index.php;# 加入了html和php
#如果文件不存在则尝试TP解析
try_files $uri /index.php$uri;
}
error_page 404 /404.html;
# redirect server error pages to thestatic page /50x.html
#
error_page 500 502 503 504 /50x.html; #可自定义错误页面
location = /50x.html {
root html;
}
# proxy the PHP scripts to Apachelistening on 127.0.0.1:80
#
#location ~ \.php$ {
# proxy_pass http://127.0.0.1;
#}
# pass the PHP scripts to FastCGIserver listening on 127.0.0.1:9000
#
#location ~ \.php$ {
# root /project/cwteam/cwteam/cwteam;
# fastcgi_pass 127.0.0.1:9000;
# fastcgi_index index.php;
# fastcgi_param SCRIPT_FILENAME /scripts$fastcgi_script_name;
# include fastcgi_params;
#}
location ~ \.php { #默认nginx不支持php拓展 这里把它添加上
root /project/cwteam/cwteam/cwteam;
fastcgi_pass 127.0.0.1:9000;
fastcgi_index index.php;
fastcgi_intercept_errors on;
#设置PATH_INFO,注意fastcgi_split_path_info已经自动改写了fastcgi_script_name变量,
#后面不需要再改写SCRIPT_FILENAME,SCRIPT_NAME环境变量,所以必须在加载fastcgi.conf之前设置
fastcgi_split_path_info ^(.+\.php)(/.*)$;
fastcgi_param PATH_INFO $fastcgi_path_info;
#加载Nginx默认"服务器环境变量"配置
include fastcgi.conf;
}
# deny access to .htaccess files, ifApache's document root
# concurs with nginx's one
#
#location ~ /\.ht {
# deny all;
#}
}
# another virtual host using mix of IP-,name-, and port-based configuration
#
#server {
# listen 8000;
# listen somename:8080;
# server_name somename alias another.alias;
# location / {
# root html;
# index index.html index.htm;
# }
#}
# HTTPS server
#
#server {
# listen 443 ssl;
# server_name localhost;
# ssl_certificate cert.pem;
# ssl_certificate_key cert.key;
# ssl_session_cache shared:SSL:1m;
# ssl_session_timeout 5m;
# ssl_ciphers HIGH:!aNULL:!MD5;
# ssl_prefer_server_ciphers on;
# location / {
# root html;
# index index.html index.htm;
# }
#}
}
注:
默认Nginx不支持对php的拓展,所以需要添加对其的拓展支持,具体查看上岸注释内容说明。
2、测试下配置是否正常
$ sudo ./nginx -t

5、三、php-fpm配置
参考:
http://blog.csdn.net/why_2012_gogo/article/details/51112477
6、四、Nginx使用
正如上面的Nginx.conf配置,Web的服务根路径已经修改为自定义项目了,所以可以直接输入访问即可,而我的项目采用了ThinkPHP开源框架,步骤如下:
1、添加html页面
<!DOCTYPEhtml>
<html>
<head>
<metacharset="UTF-8">
</head>
<bodystyle="background-color:#9999;">
<div>Hello Nginx!</div>
</body>
</html>
2、添加控制器
public function index() {
$this->display();
}
这个控制器只是展示上面的页面哦!
3、浏览器的结果
7、五、问题及解决
在上面的整个过程中,遇到了些许问题,具体可参看如下:
1、nginx:[error] open() "/usr/local/nginx/logs/nginx.pid" failed (2: No suchfile or directory)
上面的报错,是在使用nginx–s reload时发生的(前提是先nginx –s stop之后),原因是reload是检查正在运行的nginx服务,stop之后不能重新加载,只要nginx再次开启,就可以使用reload了,所以这个问题不会影响我们使用nginx,如果就是要解决的话,可以这样:
$ nginx –c /usr/local/nginx/conf/nginx.conf (关联位置)
注:
使用nginx -c的参数指定nginx.conf文件的位置。
2、[error] 3846#0: *3 kevent()reported that connect() failed (61: Connection refused) while connecting toupstream, client: 127.0.0.1, server: localhost, request: "GET /index.phpHTTP/1.1", upstream: "fastcgi://127.0.0.1:9000", host:"localhost"
报错问题:因为php-fpm进程服务未启动,所以需要开启之外,还需要对php-fpm.conf中的error_log 和pid进行配置,否则会导致php-fpm因为找不到位置而启动不了。
解决方法:
首先,添加php-fpm配置文件:
$ sudo cp /private/etc/php-fpm.conf.default /private/etc/php-fpm.conf (复制一份默认配置文件并修改)
其次,修改php-fpm.conf配置文件:
去掉前面的注释,将php-fpm.conf中的error_log修改为/var/log/php-fpm.log,而pid修改为/var/run/php-fpm.pid即可。
最后,启动php-fpm:
$ sudo php-fpm (启动)
注:
当启动时,报服务已经在使用,不能进行绑定,那么请使用kill -9 pid强制杀掉重新启动即可。
3、SQLSTATE[HY000][2002] No such file or directory
上面的报错,是本人在刚搭建好的Nginx环境中试运行PHP访问数据时出现错误了,原因是因为Nginx的数据库连接未打开,即使MySQL服务运行正常,Nginx服务也找不到数据库,解决的办法:
$ sudo find / -namemysql.sock(数据库连接文件)
注:已经发现了mysql.sock文件,从目录可看出这个.sock文件是之前系统中
xampp继承环境所持有的数据库Mysql连接文件,所以简单了,只需要将该文件映射关联到/var/mysql下即可。
$ ls /var/mysql (检查是否存在,若不存在就创建)
$ sudo mkdir/var/mysql (创建完成之后,使用ln关联)
$ sudo ln –s /Applications/XAMPP/xamppfiles/var/mysql/mysql.sock /var/mysql/mysql.sock(关联之后 刷新页面即可)
好了,到这里,我们已经介绍了Nginx的安装、基本配置及简单的验证使用了,马上开始Nginx的高效之旅吧!